Introduction
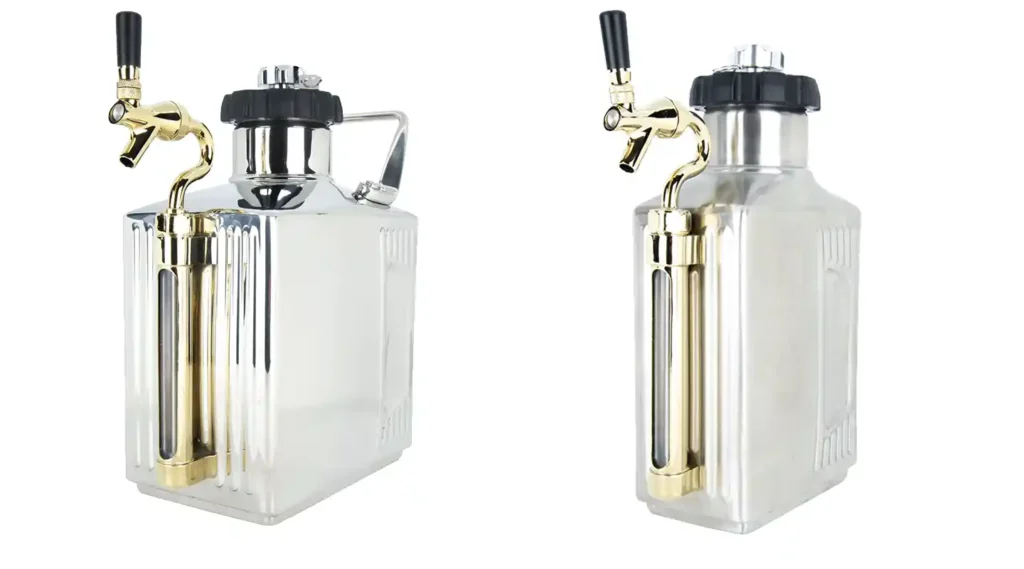
Congratulations! You are a proud owner of the World’s Heaviest Duty Pressurized Growler, the Craft Master CO2® Series! After following the easy steps in this guide, you can fill your growler at the local brewery of your choice and enjoy perfectly carbonated, brewery-fresh, ice-cold beer in the comfort of your home.
Every aspect of the Craft Master Growler has been carefully designed for performance and durability. From its strategic, fridge-friendly shape to its gorgeous stainless steel, double-wall-insulated body, the Craft Master Growler has been meticulously engineered to meet the needs of even the most discriminating beer drinker.
The Craft Master CO2® Series Growlers were created to preserve the carbonation of craft beer that you bring home from a brewery. This is done with CO2 gas, which is added to the growler by way of the CO2 Regulator Cap and Cartridge Holder.* It is important to read and retain this guide so that your CO2 is handled properly.
*Carbonation may also be added using the Ball Lock or Keg Cap, sold separately.
Part Identification
Step 1
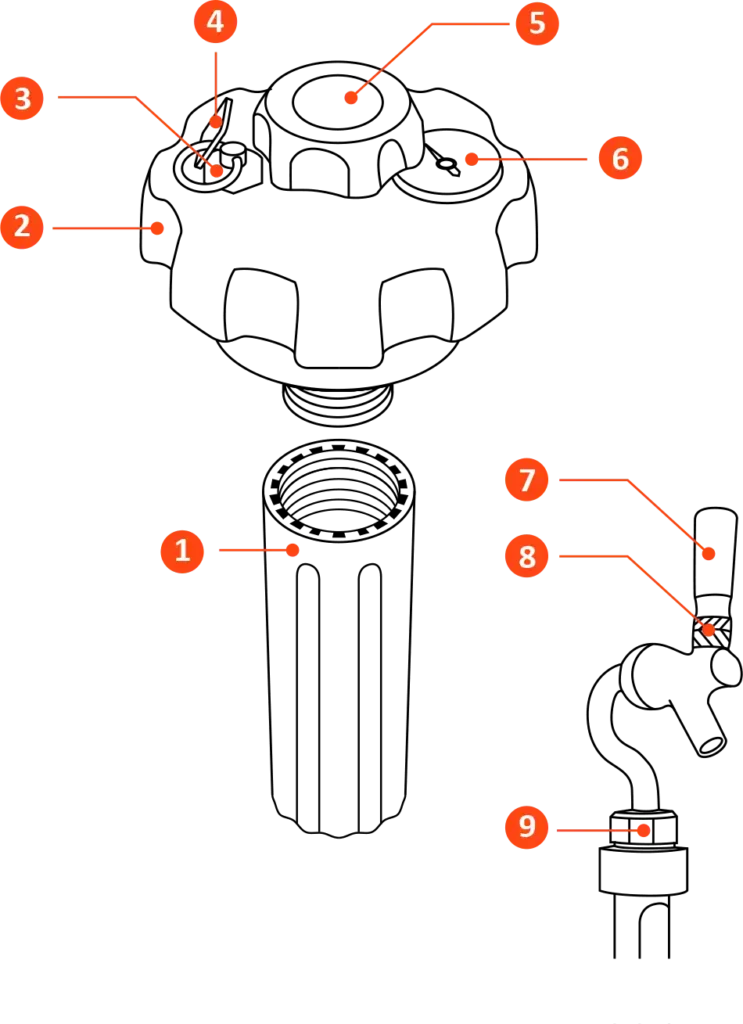
Take a moment to familiarize yourself with
the parts of the Regulator Cap and Tap.
KEY
- Cartridge Holder
- Regulator Cap
- Zipper Tab
- Regulator Dial
- Pressure Gauge
- Tap Handle
- Twist Lock Valve
- Neck Nut
- Pressure Safety Release Cap
Wash Your Growler
Step 2
Before filling your growler with a beverage,
wash it thoroughly to ensure that it is sanitary.
- Rinse the cap, cartridge holder, and growler with hot tap water. Shake and pour water out.
- Locate the packet of PBW (Powdered Brewery Wash) that is included with your purchase and empty the contents into the growler.
- Fill again with hot tap water to about the bottom of the neck. Replace the cap. Shake.
- Pull zipper tab to release pressure. Unscrew and remove cap. Pour our the wash mixture and rinse thoroughly.
- If you hold the growler with the tap facing down, some water will also run from the tap.
- Let your growler dry thoroughly with the cap removed before filling.
Caring For Your Growler
- It is not necessary to use PBW (Powdered Brewery Wash) after each use of your growler. Rinsing thoroughly with warm, soapy water before and immediately after each use is sufficient for good sanitation. Whenever possible, invert the growler to drain and dry after rinsing.
- Beer residue leaves organic and non-organic residues and microorganisms behind. Therefore, the more thoroughly your growler is cleaned, the less chance you will have microbial growth (such as mold).
- Your growler is air tight, so it is best to store with the cap off (or loose) to reduce the surface population of microorganisms. Even so, rinse your growler thoroughly with soap and water prior to each use.
- If your unit has a build in Tap, a Sight Level is included on the shaft of the Tap. It will allow you to view the level of the beverage inside. The Sight Level and the Tap can be cleaned more thoroughly by occasionally removing the Neck Nut completely with a standard crescent wrench. Be mindful that if the unit is not sealed properly when replaced, there is a potential for gas leaking.
- To prevent clogging or sticking of the Tap, after each use, run warm water over and through the Tap while opening and closing it to flush the Tap mechanism.
Loading a CO2 Cartridge
STEP 3
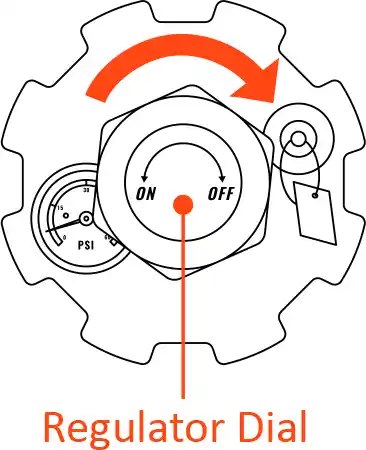
Turn The Regulator Dial To The Off Position
This prevents gas from escaping when loading
the cartridge. Do not over-tighten. Hand-tight is adequate.
NOTE
If you prefer, you can fill your growler at the brew pub, then load a cartridge to charge the cap after the growler is full. Be sure to not fill to the very top as you will need a little space to allow for the holder.
STEP 4
Insert CO2 Cartridge into Cartridge Holder.
The narrow end of the cartridge should be facing upward so that the opening may be perforated by the cap.

STEP 5
Screw cartridge holder into regulator cap.
As you tighten, you may hear a small release of gas as the tip of the cartridge is punctured. This is normal. Continue to tighten but don’t over-tighten. Hand-tight is adequate.
Know Your Cartridge Sizes
64oz growler = 8 gram
128oz growler = 16 gram
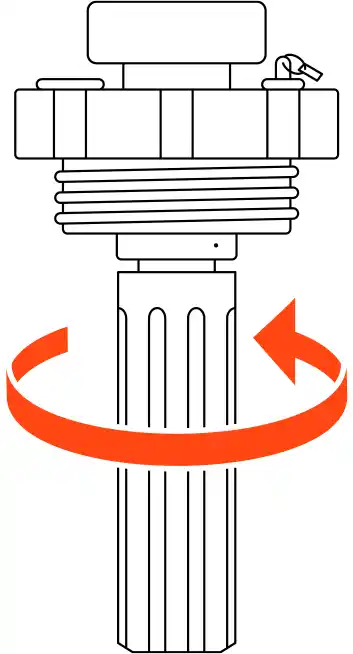
While pointing it away from your face, twist Cartridge Holder counter-clockwise to tighten. Once cartridge is spent, turn the Regulator Dial to OFF, release pressure by pulling Zipper Tab, and twist the Holder clockwise to open.
REPLENISHING CARTRIDGES
Two CO2 cartridges are included with your Craft Master CO2® Series Growler. Each cartridge has sufficient pressure to empty one full growler through the tap at 12 PSI. Use the minimum amount of gas to keep the growler pressurized when full. As the beverage is depleted, leaving more empty space in the growler, more gas must be deployed to achieve adequate pressure. Click here to order more of our food grade CO2 cartridges.
FILL GROWLER & REGULATE CO2
Step 5
Fill your growler with a beer or beverage
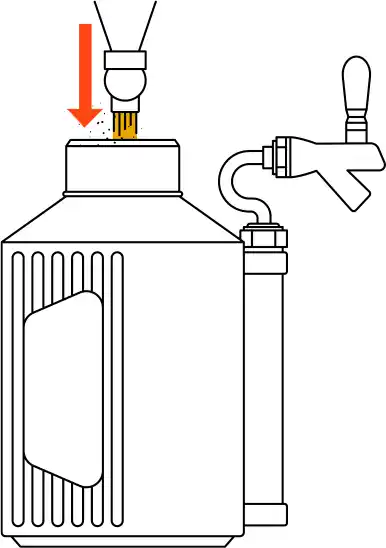
Now that the regulator cap has been charged with CO2, you are ready to fill your growler with beer or a beverage of your choice. (Note: We recommend emptying your growler within 15 days of filling it.) Though foaming over the edge is not problematic, it is recommended to fill only to the base of the growler neck to allow
space for the cap to be inserted.
Step 6
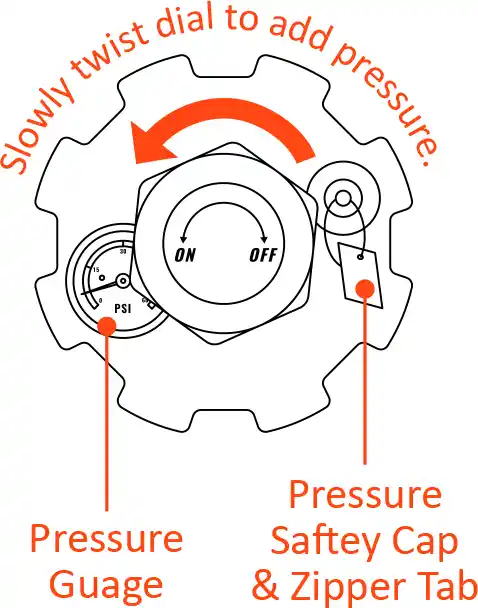
Regulate the CO2 using the pressure guage.
If you have a growler with a tap, check that the Twist Lock Valve on the tap is locked so that beer does not come out
of the tap during pressurization.
Slowly turn the Regulator Dial toward ON. Watch the Pressure
Gauge as you add pressure. Keep the Gauge in the middle of the
GREEN zone, which is about 12 PSI.
Once you have enough pressure, turn the dial back to OFF. To release excess pressure, pull the Zipper Tab slightly until the gauge is back in the GREEN zone.
TAP YOUR BEER
Step 7
Tap and pour your beverage!
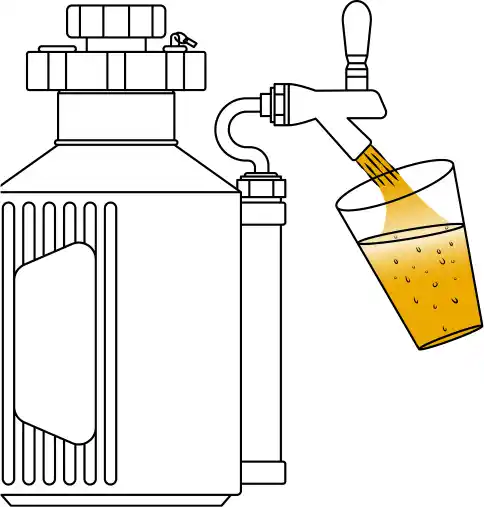
| Twist the Twist Lock Valve counter-clockwise to open the tap. |
| Hold a glass or cup beneath the tap spout. |
| Pull the Tap Handle forward to propel your beverage out of the tap and into the glass. |
| Enjoy your perfectly carbonated and chilled brewery-fresh beer! |
WARNING
As with any keg system, always make sure your Regulator Dial is turned to the OFF position, and you have pulled the Zipper Tab to release any pressure before you unscrew the Regulator Cap!
TIP
Twist the Regulator Dial to add more CO2 pressure as needed. This may be necessary to regulate the flow of your beverage as your growler becomes depleted, or to store your beer.
PRO TIP
Your Craft Master CO2 Series Growler is made with a space saving Swivel Tap. Before filling, loosen the Neck Nut with a crescent wrench, and to turn the tap 90°. Tighten in place. This will enable you turn your refrigerator door into a “kegerator” as you tap beer without removing your growler from the fridge.
Troubleshooting & FAQs
Any beverage that uses CO2 is appropriate, such as beer, cider, sparking wine, soda, cocktails that use soda or tonic water, etc.
Yes: 8 gram N2O cartridges will work with the 8 gram cartridge holder. You can make cold brew with a 1/2 fill (32 ounces) in the 64oz growler. N2 cartridges will NOT work, and the cold temperature
of N2 cartridges may damage your regulator’s components.
The Twist Lock Valve the Tap Handle may be open. Close the Twist Lock Valve before adding CO2 pressure to your growler.
Turn the Regulator Dial to the OFF position. Check the pressure is approximately 10-12 PSI (Pressure Gauge is in the GREEN zone). If pressure is higher, use the Zipper Tab to release excess pressure.
Lower the pressure to about 5 PSI and tip the growler forward as you tap out the last beer.
This is normal. Reducing temperature will reduce the pressure inside the growler. Simply top it off by releasing a little more gas with the Regulator Dial to bring it back up to the proper pressure.
Warnings: Please Read
SAFE HANDLING OF CO2 CARTRIDGES
Included with your purchase are two Craft Master Growler CO2 cartridges, which are required for using the Craft Master CO2 Regulator Cap. We include the highest quality natural, food grade CO2. The cartridges are pressurized and must be handled and stored with care.
- Keep out of reach of children
- Store in a cool, dry place
- Never expose to heat or flame
- When charging your growler, always point the cap and cartridge top away from your face and body
- Be mindful of the pressure when your growler is charged
BEFORE YOU REMOVE REGULATOR CAP
Before you remove the cap from your growler, always turn the Regulator Dial on the cap to the OFF position. Then release any pressure inside the growler by gently pulling the Zipper Tab on the
Pressure Release Safety Valve.
Once the cap is removed is removed from the growler, it is important to exercise caution when unscrewing the Cartridge Holder from the cap, even if the cartridge inside it seems to be empty.
Always unscrew the holder slowly and carefully, pointing it away from your face and body. This will allow the pressure from a full or partially full CO2 cartridge to be released harmlessly.